Technology & Facilities FAQs
Accounts and Email
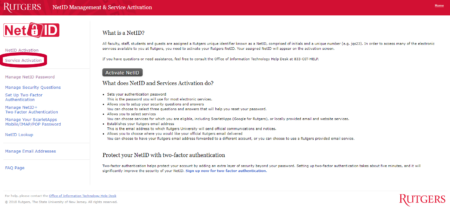
All Rutgers SHP students, faculty, and staff are issued a NetID, a unique identifier that allows you to access many electronic resources within the university. You can activate and manage your NetID, along with associated services, at netid.rutgers.edu.
The School of Health Professions uses Rutgers Connect, an Office 365-based client, for email. Here is how to activate your email:
- On the NetID page, click “Service Activation” on left-hand side of the page.
- Select “Rutgers Connect” from the list of services.
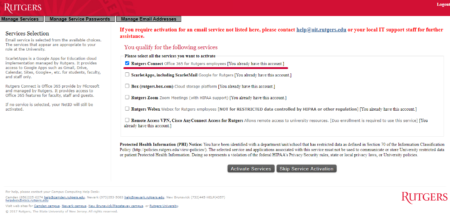
- Your Rutgers Connect account should be created (it might take some time to activate it). Afterwards, you can access your email through “connect.rutgers.edu“.
Typically, your email will consist of your NetID, followed by “@shp.rutgers.edu”. For instance, if your NetID was “abc123”, your email would be “ab123@shp.rutgers.edu”.
As this is based on Microsoft Office 365, you are also able to access any of the included applications, such as Word, Outlook, Excel, and PowerPoint. You can even download the applications to your machine.
- On the Rutgers Connect page, click on the “waffle” icon on the top right of the page.
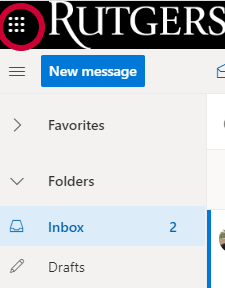
- Select “Office 365”
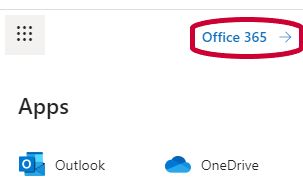
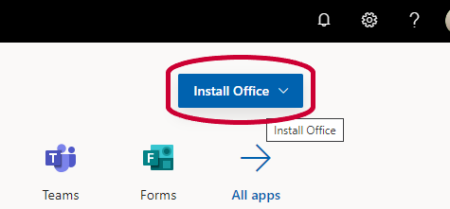
- On the following page, click on “Install Office”.
- You will then be prompted to enter your NetID and password.
- Follow the installer instructions to install Office on your machine.
NOTE: You are limited to 5 install licenses at a time.
If you have any further questions regarding Rutgers Connect, feel free to visit this page: https://it.rutgers.edu/rutgers-connect/faqs/rutgers-connect-faq/
To connect to RUWireless, you must have a valid NetID. You can then begin the process of connecting a device to the network.
Further instructions can be found here.
Two-factor authentication adds an extra layer of security to your Rutgers account. In fact, many services (such as VPN) require that you have it set up.
Without this service, your account may be more vulnerable to cyber-attacks such as “phishing”. Please see this article on the subject to better understand the subject: The-Trouble-With-Phishing
Two-Factor Authentication can be set up through the NetID Management Page and selecting “Set Up Two-Factor Authentication” on the left. You then follow the steps to activate the service.
We recommend linking it to the Duo Mobile app, which can be downloaded via the iOS App Store or Google Play.
Using Cloud Storage
There are two main cloud storage services available to the SHP community: Box and Microsoft One Drive.
As OneDrive is automatically included in the Office 365 package included in our Rutgers Conenct accounts, this should be available by default. You can set up a Box account through the NetID Service Activation page.
Please note that there may be a preferred place for each form of content. Here is an abbreviated matrix for each type:
Classification of information |
Box |
OneDrive |
| Public and Internal information |
✓ |
✓ |
| Course materials shared with students and instructors | ✓ | ✓ |
| Materials intended for publication/shared on non-password protected Rutgers websites |
✓ |
✓ |
| Licensed Software |
✓ |
✓ |
| Student records (FERPA) |
✓ |
✓ |
| Copyrightable and patentable information related to research |
✓ |
✓ |
| US Government Controlled Unclassified Information (CUI) |
✓ |
✓ |
| Bank acccounts, financial data, social security numbers, drivers license & passport numbers |
✓ |
✓ |
| Research materials containing IRB-prohibited data | Consult your department | |
| Protected Healthcare Information (PHI) | Consult your department | |
| Proprietary information covered under contract or non-disclosure agreements | Consult your department | |
| Login credentials (i.e., Username AND Password) | X | X |
| Credit/Debit card numbers | X | X |
| US Government Classified & NIST 800-53 (FISMA) | X | X |
PLEASE NOTE: This is a cursory overview of what items can be stored in the cloud. For a complete list, please follow this link: https://box.rutgers.edu/data-classification-and-storage-matrix/
Google Drive is also available through ScarletApps, which can be activated using your NetID. You can find detailed instructions on how to set it up here: https://it.rutgers.edu/scarletapps/
Using Zoom

Zoom is a video conferencing tool that has proven to be a big help in higher education. Whether it’s for online classes, department meetings, or larger seminars, it provides multiple options for remote communication.
Here are a few tips to get you started with using Zoom.
NOTE: This set of instructions is based on the assumption that you are not initiating the meeting, and that you have not already installed Zoom on your machine.
UPDATE: As of July 2020, all Zoom meetings will either require a password to join (usually provided by the host) or a waiting room (where the host will manually allow participants to join).
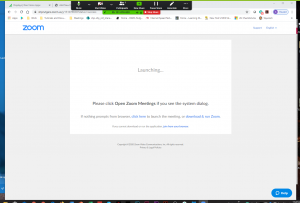
- Follow a meeting URL provided by the host of the Zoom meeting. These generally follow the format “zoom.us/j/(meeting ID)”.

- If the Zoom application is not installed, you will be prompted to install it on your machine. Follow the installer instructions.


- After the initial installation, whenever you follow subsequent Zoom URLs, it will open automatically (usually preceded by a prompt asking you to open it).
- After installing, Zoom will enter the meeting automatically. You should see a pop-up preview of what your computer’s webcam will capture, then be asked if you wish to share your webcam in this meeting.

- Once you enter the meeting, you will be prompted to connect to the computer’s audio. Clicking this will share your microphone through this meeting.

- Please note that if you do NOT choose to connect to the computer’s audio, you may not be able to hear other people in the meeting.
- There is also an option to have all audio go through a phone. The instructions to do so can be found here:

- Once you’re connected, you should by default see your webcam (if you chose to share it), as well as a toolbar at the bottom of the window and whoever else is logged into the meeting.

- Clicking on the bottom left corner will allow you to mute or unmute your microphone.

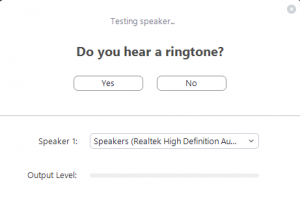
- Click on the arrow next to the microphone icon to change the microphone and/or speaker used in this meeting. You can also test your audio in this window.


- Click on the arrow next to the microphone icon to change the microphone and/or speaker used in this meeting. You can also test your audio in this window.
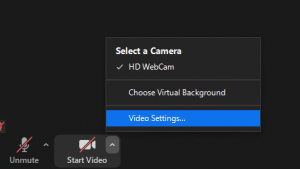
- Click on the camera icon to turn on or off your webcam If you chose to share it).

- As with the microphone, you can click on the arrow to the left of this icon to choose which webcam to share (if your computer is connected to more than one). You can also choose advanced options, such as video quality shared and a virtual background.


- As with the microphone, you can click on the arrow to the left of this icon to choose which webcam to share (if your computer is connected to more than one). You can also choose advanced options, such as video quality shared and a virtual background.
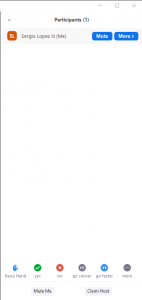
- Click on the “Participants” icon to open the Participants window. This is where you can see everyone logged into the meeting.

- If you hover your cursor over your name, you will see a number of options, including the option to change what name is displayed.

- At the bottom of this window, you will see a few status options. Likely the most important one is the option to “Raise Hand”. This indicates to the host of the meeting that you would like to speak. Other options, such as “Agree”, “Disagree”, “Speak Faster”, and “Away”, are also available.

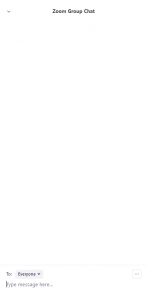
- Click on the “Chat” icon to open the Chat Window. This is an in-line text communication tool that allows users to send messages to the rest of the meeting.

- By default, all chat messages are public, and thus will be seen by everyone in the meeting. However, you may choose to send a message privately to a single person in the meeting by selecting their name in the drop-down menu right above the entry area.

- Once the meeting is over, click on “Leave Meeting” in the bottom right of the window to close Zoom and leave the meeting.


One of the most useful tools in Zoom is the ability to share a screen in a meeting. This allows other participants to see what is on your computer’s display, such as important documents and PowerPoint presentations.
PLEASE NOTE: As of March 2020, the default setting only allows the host of a meeting to share. This option can be changed by clicking on the arrow to the right of the Share icon and selecting “Settings”.

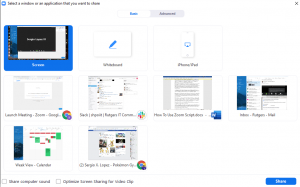
- Click on the green “Share” icon in the center of the toolbar at the bottom of the Zoom window. This should open up a window showing all the possible things on your machine that you can display to other users.
- You can choose to share your computer’s entire screen, or one specific application that is open. Once you have chosen what to share, click “Share: on the bottom right of the pop-Up.

- We generally recommend that you share your entire screen when using PowerPoint.
- Click on the checkbox “Share Computer Sound” to allow others to hear whatever sound is being used in the content you are sharing. This is helpful for when you are sharing video clips or audio.
- When a user is sharing a screen, Zoom will switch to full-screen by default. Also, the toolbar will relocate to the top of the window, with a red icon under it labeled “Stop Sharing”, which allows you to stop sharing your screen.
- Other participants in the meeting will appear in a pop-up window as a row of webcams (or just their names). You can freely move this pop-up to other locations on the screen, and choose how large it appears.
- When using this feature with a computer with multiple displays, it is important to remember which display you are sharing. Also, try not to use any feature that makes an application appear different on multiple displays, like Presenter View in PowerPoint.
- Click on the “Stop Share” icon to return to the default view.

VPN
Virtual Private Network (VPN) access is required in order to connect to resources within the RBHS and Rutgers network boundaries. An example would be CORE folders.
A VPN connection is NOT required for resources accessible on the internet. Examples would be CONNECT, ONEDRIVE etc.
Setup consists of four steps:
- Signing up for DUO
- Signing up for VPN access
- Setting up your work desktop for remote access
- Setting up your home/remote computer
Using the VPN consists of two steps:
- Connecting to VPN
- Remotely connecting to your work computer
INSTRUCTIONS FOR SETTING UP VPN ACCESS
Make sure you are setup for DUO (NetID Two-Factor Authentication)
If not, visit this site for instructions:
https://it.rutgers.edu/two-step-login/knowledgebase/enrollment-guide/
Note: DUO will need to be used every time you login with your NetID
IMPORTANT: VPN access will not work without DUO
If you are already setup for DUO, follow these steps:
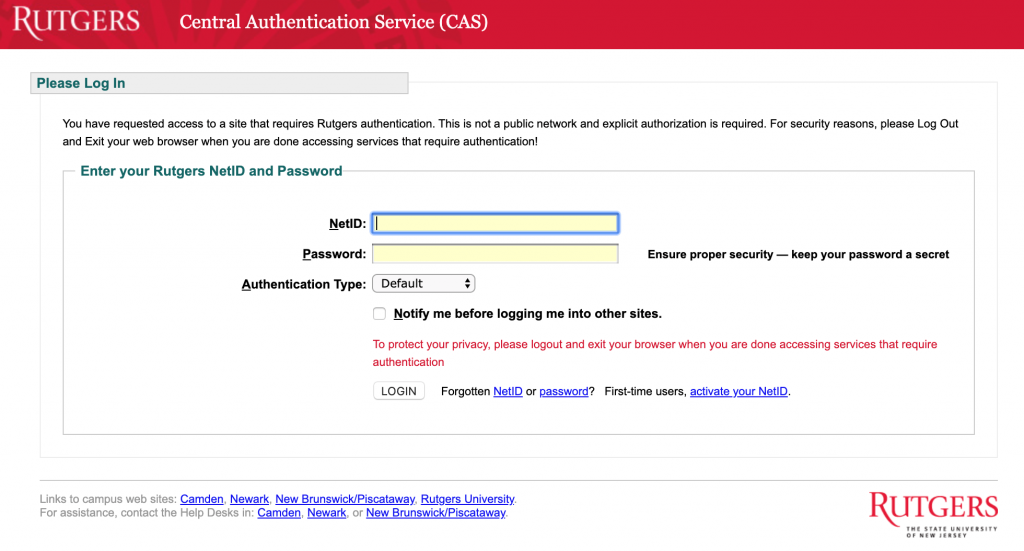
Go to http://soc.rutgers.edu/vpn
Click on Service Activation
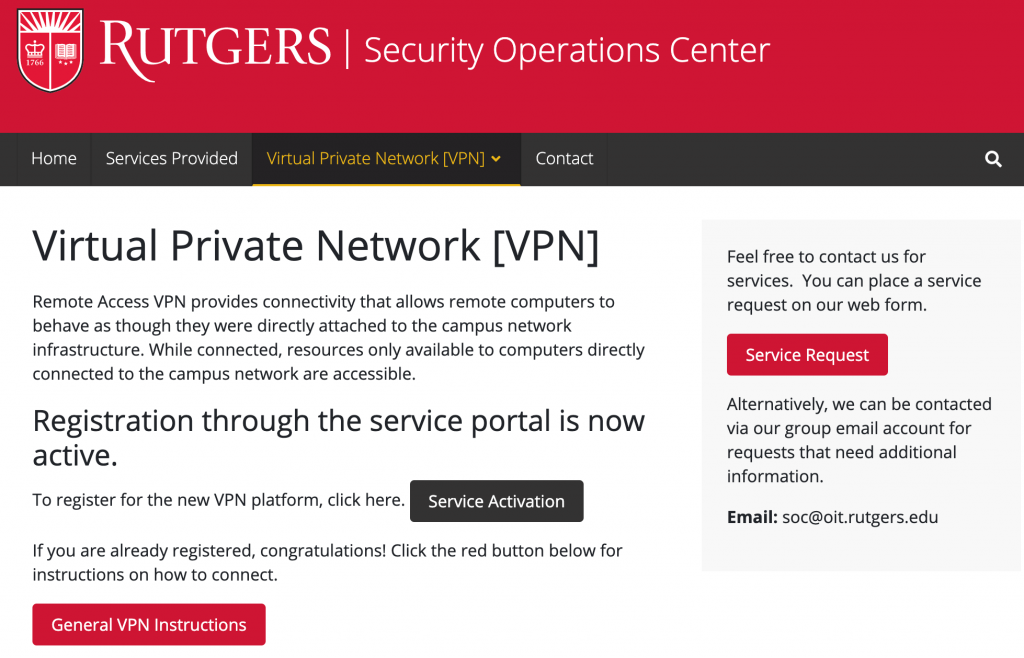
Login thru CAS
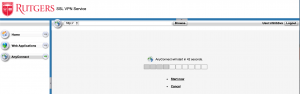
Make sure you check the box for Remote Access VPN

Click on Activate Services
Make sure you get an activation confirmation.
It may take up to an hour to activate VPN access
Setting up work desktop for remote access
Make sure you know the name of your work computer. Write this down and bring it home. You will need this to connect to your work desktop. Make sure you leave your work desktop on!!
Please put in a ticket so that we can setup your desktop computer for remote access. Administrative access to your computer is required for this step.. You can place a ticket by sending an email to shphelp@shp.rutgers.edu
Setting up your home/remote computer
Once the above steps have been completed, you can setup your home/remote computer. This is the computer you will be using from off-campus.
To setup your home/remote computer, go to http://vpn.rutgers.edu
Install the client software when prompted.


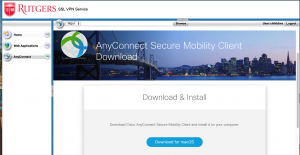
Follow steps to install the downloaded file. This will install the Cisco Anyconnect VPN Client
Connecting to VPN and your work desktop
To connect to the VPN, open the Cisco Anyconnect App. Make sure the server name is vpn.rutgers.edu. Click Connect

In the next window, enter your NetID username and Password
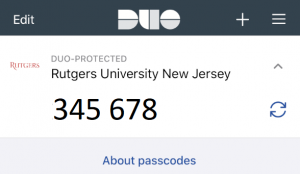
For Duo Action or Second Password, get the numeric DUO one-time code
To get the DUO numeric code, On your mobile device, open the DUO app.
Click the down arrow
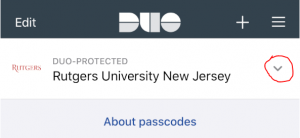
Enter the 6 digit code shown in your app. Refresh the code if necessary![]()
Click Accept on the next window

At this point you are connected to the VPN.
Next, use the Windows Remote Desktop software to connect to your work desktop computer. Make sure you use the complete computer name including the “core.umdnj.edu”, e.g ssbhpdo100d01.core.umdnj.edu
Now you are able to access your work desktop just as if you were at your desk
Make sure you disconnect from your desktop AND VPN when done
Kaltura
Canvas supports the current and first previous releases of the following browsers:
- Chrome 83 and 84
- Firefox 77 and 78 (Extended Releases are not supported*)
- Edge 83 and 84
- Respondus Lockdown Browser (supporting the latest system requirements)
- Safari 12 and 13 (Macintosh only)
For best performance, we recommend you update your preferred browser to it’s latest version.
Further information for Canvas’s system requirements can be found here:
https://community.canvaslms.com/docs/DOC-10720-67952720329
Kaltura is a video hosting service that anyone in Rutgers University can use. It is fully integrated in most learning management systems, and allows you to upload, embed, and share your media content throughout whatever platform you are using.
Here are some of the basics of Kaltura:
Kaltura is automatically included in each Canvas account. If you go to “My Media”, you will be prompted to allow Kaltura access to Canvas. Click “Authorize” (on the lower right of the prompt).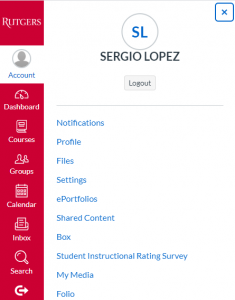
- In the “My Media” page, click on “Add New” in the top right. Then select “Kaltura Personal Capture”.

- This should lead you to the download page, where you can follow the prompts to put the application in your machine.

- This will always take you to the download page for the Personal Capture Desktop Recorder, but you only need to download the Recorder once. After that, the Recorder will open automatically whenever you select the “Kaltura Personal Capture” option. You may also record and upload directly from the Personal Capture application by opening it from your Applications menu.
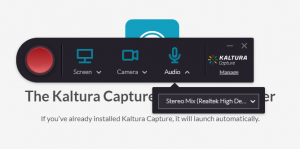
- Once downloaded, you can start the application by clicking “Add New” and selecting “Kaltura Personal Capture”.
- Click on the big red “Record” button to start recording. You should see a three-second countdown before the recording actually starts. You will see a list of options of what to record, including screen, camera, and microphones.

- Click on the red square “Stop” button to stop recording. It will ask if you’re sure you want to save, and clicking “Yes” will open up the Library.
- From here, you can choose “Save” to only record it to a designated folder in your machine, or “Save and Upload” to upload it to your Kaltura account. If you choose the latter, the video will be visible under “My Media” (when it has finished uploading and processing).


Kaltura is fully integrated into Canvas, making it easy to share videos to your students. All videos uploaded into “My Media” can be embedded to a Canvas course site.
- In the section of Canvas where you wish to embed a video, click on the icon that looks like a plus sign
 . This will open a new window.
 - In the drop-down menu, select “Page”, then select “[New Page]” in the field beneath that. Enter a name for this new page and then click “Add Item”.

- The new page will be added to the end of the section. Click on the title of the page to open it.

- Click “Edit” on the top right of the page.

- Click the downward arrow icon in the toolbar above the Rich Content Editor window and then on “Embed Kaltura Media”. It will be beside the YouTube icon.
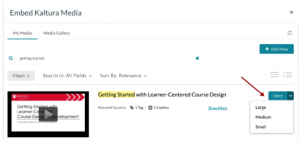
- You should see a pop-up window displaying all your Kaltura media files. Click the “Select” button directly to the right of the video you wish to embed.

- You may also change the resolution of the embedded video by clicking on the arrow to the right of the “Select” button. Your options are “Large”, “Medium”, and “Small”.
- Then you will see the video added to the text editor. Scroll down and click “Save” or “Save and Publish”.


Kaltura on Canvas keeps all media in the Kaltura Media Gallery. This is where all recordings with the apps go once they are finished. You may also upload existing videos into the gallery.
- Log into your Canvas account.
- Click Account link in the left navigation menu and select ”My Media”.

- In the “My Media” page, click on “Add New” in the top right. Then select “Media Upload”.

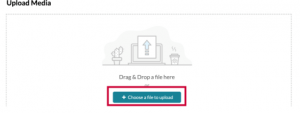
- Once you are in the Media Upload page, you can click “Choose a file to upload” to select a video file on your computer to upload. You may also drag and dropp the file in the upload area.

- The file will then start to upload. When the blue bar turns green and it states Upload Completed, scroll down and complete the rest of the details:

- a. Fill out the name of the media. It will default to the file name of the media uploaded. This area is required. The following areas are optional.
- b. Add a description of the content.
- c. Add any tags. Tags help you organize your files by associating them with one category. Type the word or letters with which you wish to tag your media – ex. BIO101 – and select the tag that appears that matches your designation.
- Once you have finished editing this information, click on “Save” on the bottom of the page. The video will take a few moments to process before it can be played (depending on the size, it may take longer).


In order to properly use Examsoft, your personal laptop must meet certain specifications. You can find these requirements here:
Minimum safety requirements for PC
Minimum safety requirements for Mac OS X
Minimum safety requirements for iPad
Further explanations can be found here.
Virtual Computer Labs
All computers in the OIT Computer Lab are available for virtual access to any students, faculty, staff, or guests at Rutgers SHP. This grants you access to a long list of useful software that may otherwise not be available for someone’s virtual location, including the full Microsoft Office and Adobe Creative Cloud Suites (a full list of available applications can be found here).
These are available 24 hours a day, seven days a week!
You can access the Virtual Lab through the following link: https://it.rutgers.edu/virtual-computer-labs/
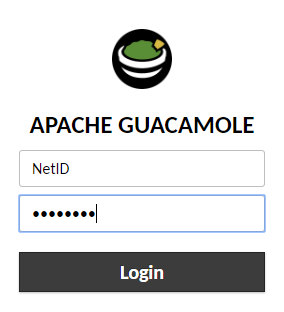
- Go to https://labgateway.rutgers.edu. Login with your NetID and Password.
- After a successful login, you will see the following prompt.
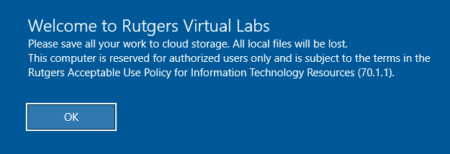
- Click “OK” and you will be redirected to the desktop of the virtual computer.
If you need to print a file from your remote lab computer, you can download a PDF of the file that you can print from your local computer. When you go to print the file, select Guacamole Printer from the Select Printer options.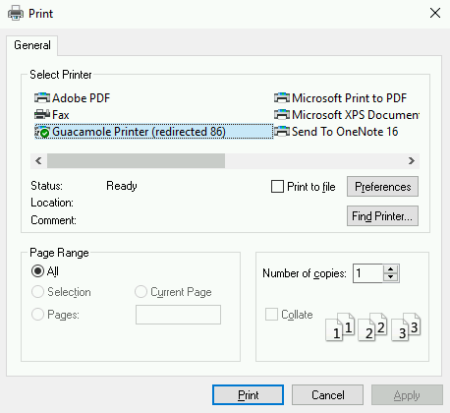

This will download a PDF of the file on your local computer.
To save files, you will need to upload them to a cloud storage solution, as remote file saving is disabled.
For faculty, staff, and SHP students, you can save the files to Onedrive, which is part of your Rutgers Connect account.
Box is also available to all SHP students.
Feel free to explore several of our instructional videos in our TechTalk series!
Technology Services Support
To request assistance, please create a ticket by emailing
shphelp@shp.rutgers.edu
Phone: 973-972-9171
Support hours:
Mon-Thu 8am – 6 pm, Fri 8am – 5 pm
Additional Support
RBHS Help Desk
isthelp@rbhs.rutgers.edu
Phone: 732-743-3200
Support hours: 24/7
Rutgers (Legacy) Help Desk
help@oit.rutgers.edu
Phone: 848-445-4357
Hours vary
Facilities Support
To request assistance, please create a ticket by emailing
shpfacilities@shp.rutgers.edu
Phone: 973-972-9171
Support hours:
Mon-Fri 9am – 5pm